
Before installing the KIT2 driver, it's important to first install the MPLAB IDE software. This ensures that the development environment is properly set up for working with the KIT2 programmer.
1. Install the KIT2 DriverOnce you connect the KIT2 via USB to your computer, a prompt will appear saying "Discover New Hardware." You should choose the option to automatically install the driver. The system will then search for the appropriate driver and complete the installation process. This usually takes just a few minutes, and once done, the KIT2 will be ready for use.
2. Connect the KIT2 ProgrammerYou can connect the KIT2 to the target board, though it's not necessary at this stage. If you're testing or setting up the software, you can proceed without connecting the target board.
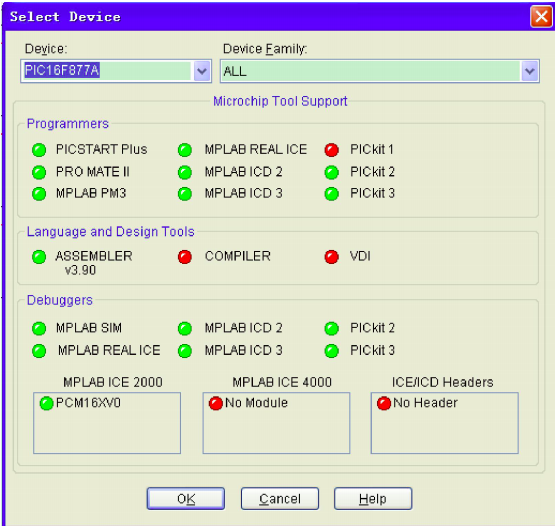
1. Select the target chip: Go to Configure > Select Device > OK!
2. Connect the KIT2: Navigate to Programmer > Select Programmer > Pickit 2
3. Download the operating system: Go to Programmer > Download OS. After about 10 seconds, the operating system will be successfully downloaded.
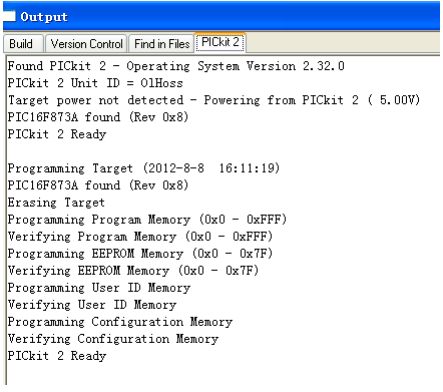
When connected to the target board, the interface should display a normal status. If no board is connected, the screen may show a different message.
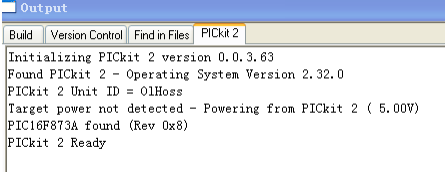
If no target board is connected, the display might look like this:

Once the target board is connected, click on Programmer > Connect to see the normal prompt.
Note: To disconnect the KIT2 properly, go to Programmer > Select Programmer > None, then unplug the KIT2 from the USB port.
3. Power Supply SetupThe KIT2 can power the target board through the USB connection, but keep in mind that the USB voltage from the computer is limited. If the target board requires high current, it’s recommended to use an external power supply instead. Otherwise, the KIT2 may not function correctly due to insufficient power. For low-current boards, the KIT2 can provide enough power directly.
Steps to enable power supply:
Go to Programmer > Settings:
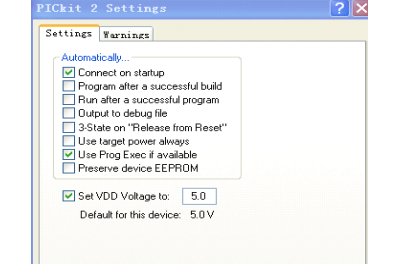
Check both options and click OK.
Now the KIT2 is online! If you encounter any issues during connection, try removing the USB cable (wait for a single beep), then reinsert it after ensuring the software is set to reconnect. Always make sure to select None for the programmer before unplugging the device.
4. Steps to Burn a Program Using KIT21. Select the chip: Go to Configure > Select Device
2. Connect the programmer: Programmer > Select Programmer > Pickit 2
3. Import the hex file: File > Import (select the file to burn)
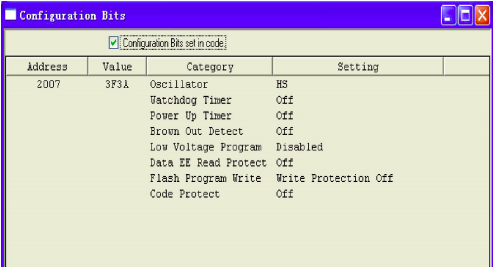
4. Set configuration bits: Configure > Configuration Bit

5. Start programming: Programmer > Program. A success message should appear if everything is working properly.
1. Select the target chip: Configure > Select Device
2. Connect the debugger: Debugger > Select Tools > Pickit 2
3. Set configuration bits: Configure > Configuration Bit (same as before)
4. Open the project file: Project > Open
5. Compile the source code
6. Debugger > Program (note: every time you compile, you must download the program again. You can set it to auto-download after each compilation.)
At this point, you can run the program, step through the code, or perform other debugging tasks.
Disposable oil elf bar wpuff vapor
Shenzhen Yingyuan Technology Co.,ltd , https://www.yingyuanvape.com