The Coolmaster MasterCase series has already been listed on the MasterCase 5 and MasterCase Pro 5, and the latest MasterCase Ultimate body: the Maker 5 chassis is also on the market. Cooler also finally introduced the third gear of this series.
Let's share the bottom with MasterCase Maker 5 in the end!
Outer packaging uses color printing, after all, is a high-end chassis, at least "fan" still have to

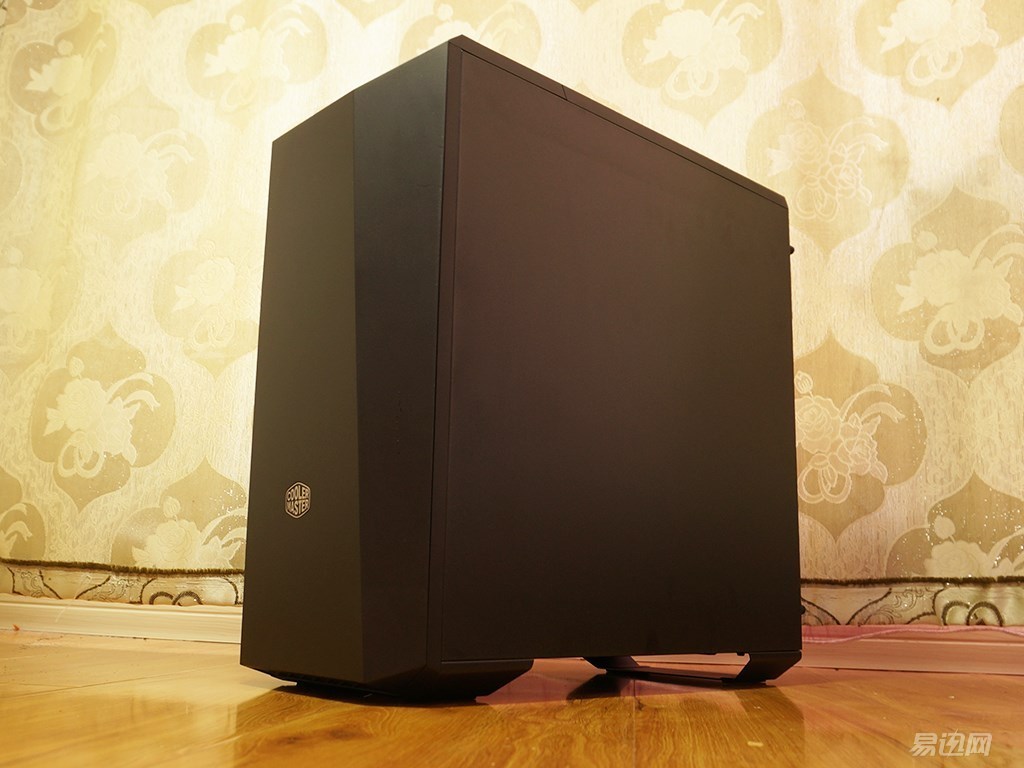
Maker 5 has the same "bone" as the MasterCase series, but the "armor" is greatly different, and it looks like the temperament is different. After adding a front panel, the chassis looks more angular, simple and hard style!
The net weight of the Maker 5 is close to 13kg. In the chassis of the middle tower, it is really heavy. The thickest sheet is also 1mm. The material used in the chassis is not to worry about.

Chassis with a black design, the surface of the steel plate is treated with matte, even the internal steel plate is like this, there is a feeling of micro matte
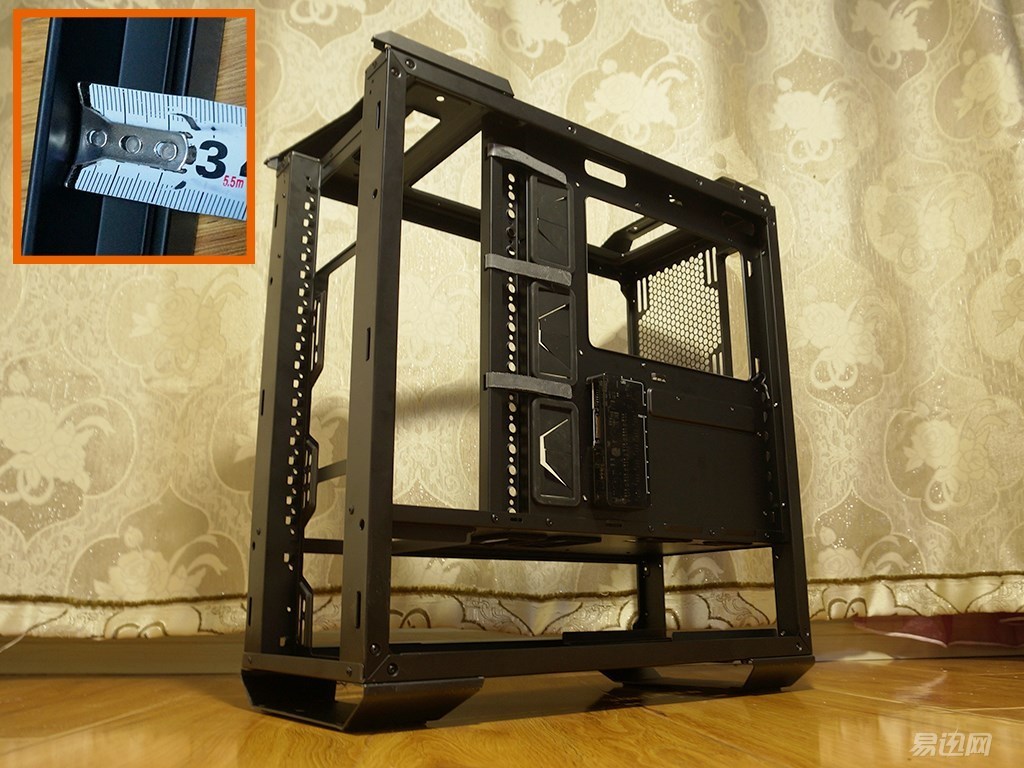
Chassis size .6mm, consistent with previous MasterCase products.
Chassis front and back: The standard 7 card slot design, typical in the tower, power down the structure.
The biggest difference between the appearance of the chassis and the top two of the series is the top and front panels.

Front I/O panel: One USB 3.0, one Type-C USB 3.0, two USB 2.0, headphone and microphone connectors, fan controller, LED light controller.
When the chassis is lit, the front I/O panel has a red LED logo, and the effect is still very good.
Of course, reducing the number of conventional USB 3.0 interfaces to Type-C is still somewhat controversial. Nowadays, there are not many Type-C devices, so this step is still very advanced.

The biggest difference in front is that this semi-closed front version, in addition to changing the shape of the role of the board there are sound insulation cotton, plate front cover has a magnetic snap, pull down to maintain a certain degree of opening, and will not Falling down, very bright industrial design.

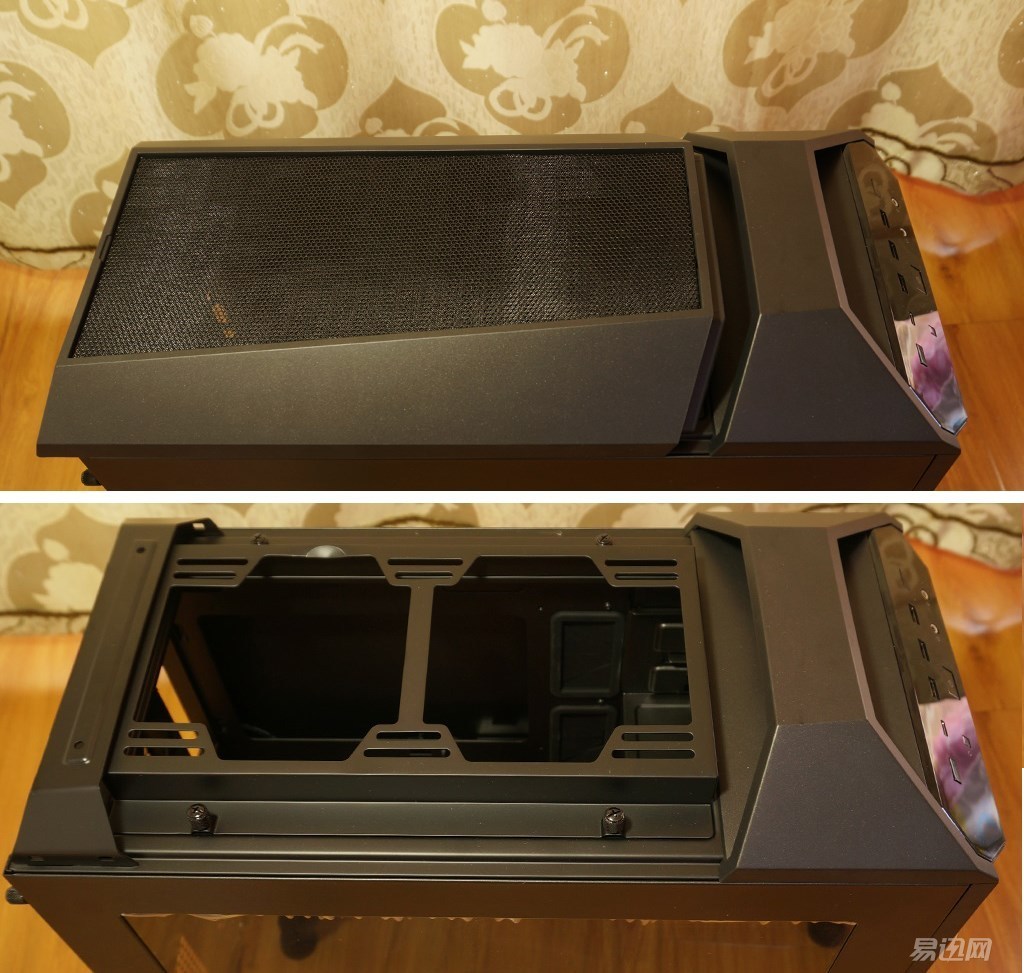
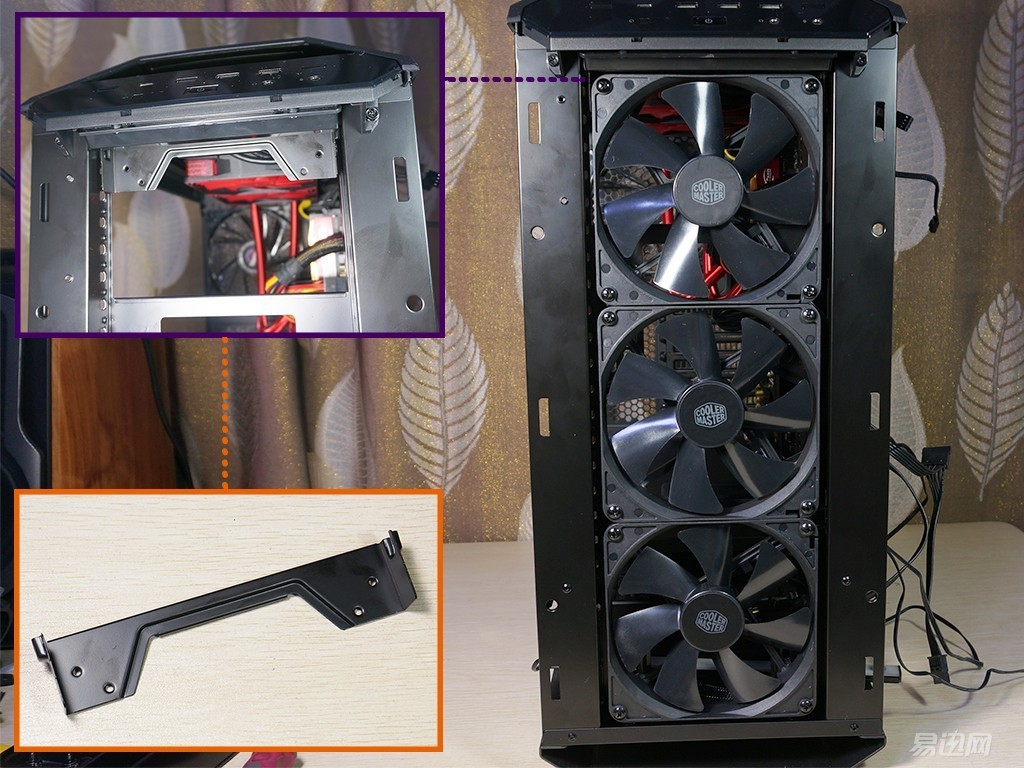
The top has a detachable magnetic dust cover compared to the first two of MasterCase, and it is also a magnetic buckle . If the upper part is not equipped with a fan, it can be directly covered to enhance the dustproof effect.

The top cover can be removed by pulling it back, and it is not screw-fixed. It has a water-cooled bracket installed inside it and supports a 240/280mm cold row or 1202/1402mm fan.
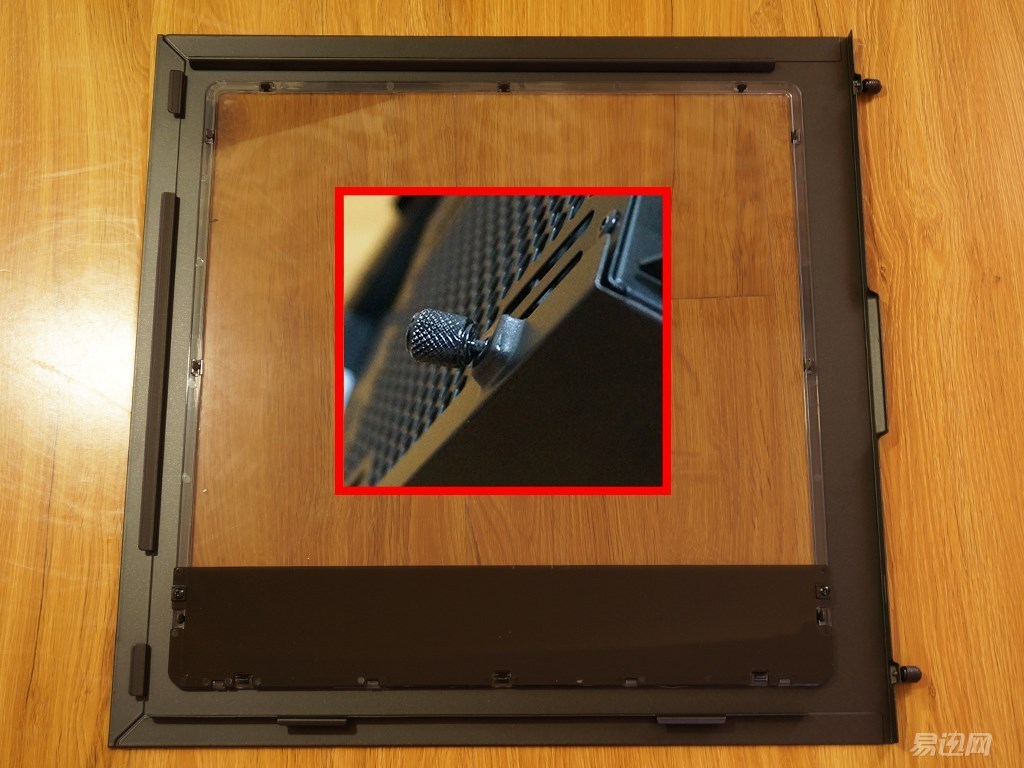
Side panel has a large area of ​​acrylic side through the bottom of a brown acrylic, corresponding to the power supply and the bottom of the hard disk, if you do not like it can be removed directly after the removal of the screw.
In addition, after the side plate screws are removed, a fall-off prevention design is adopted, and the part of the chassis with a hand-screw is basically adopted this design.
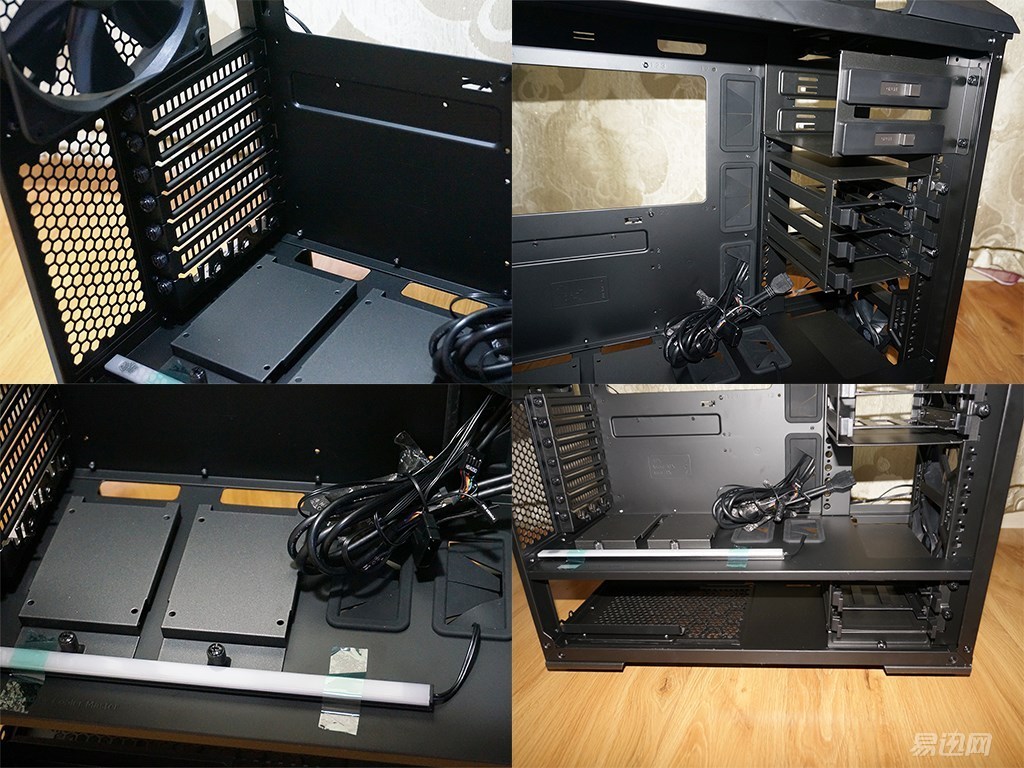
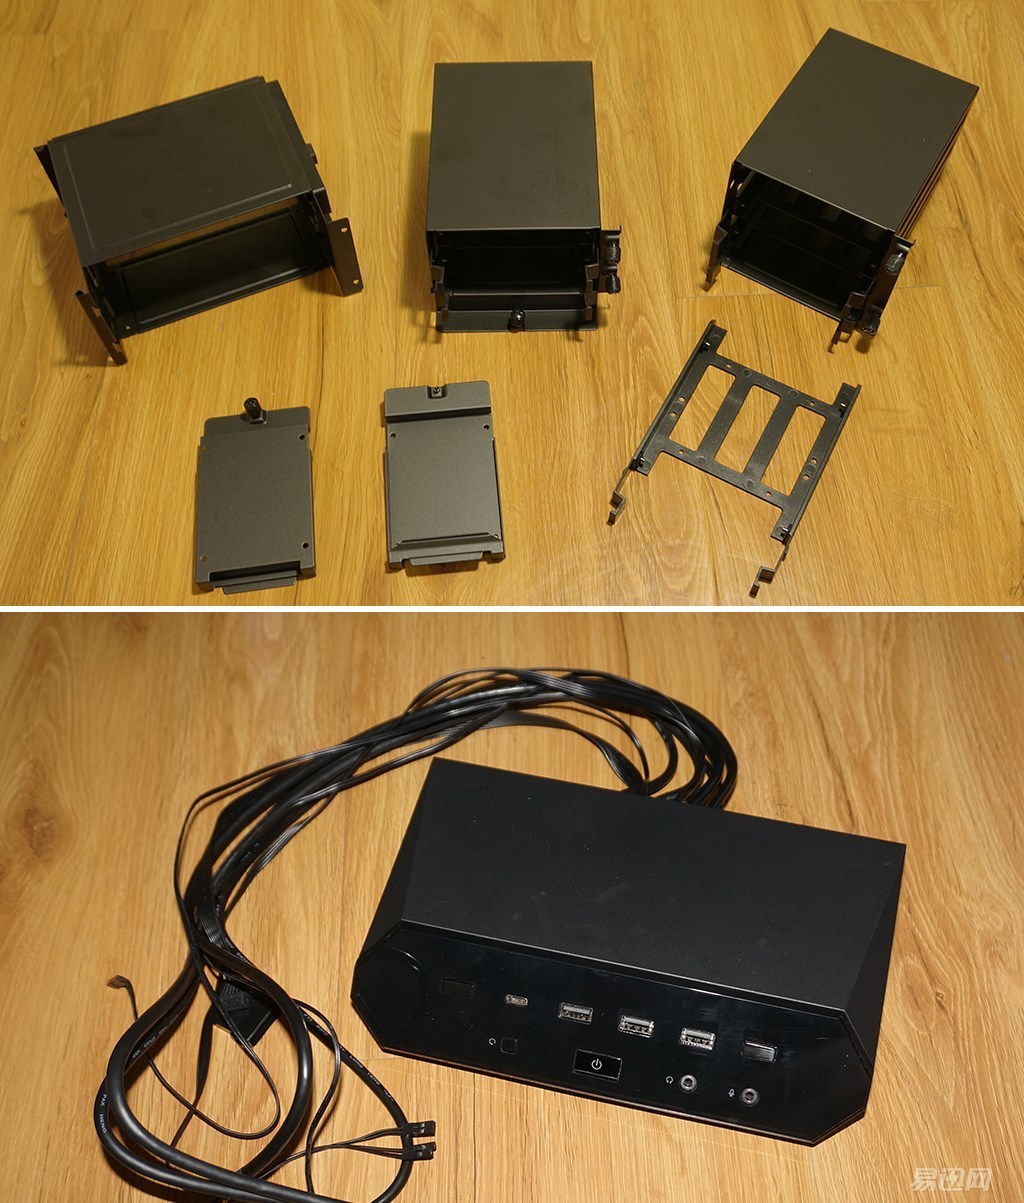
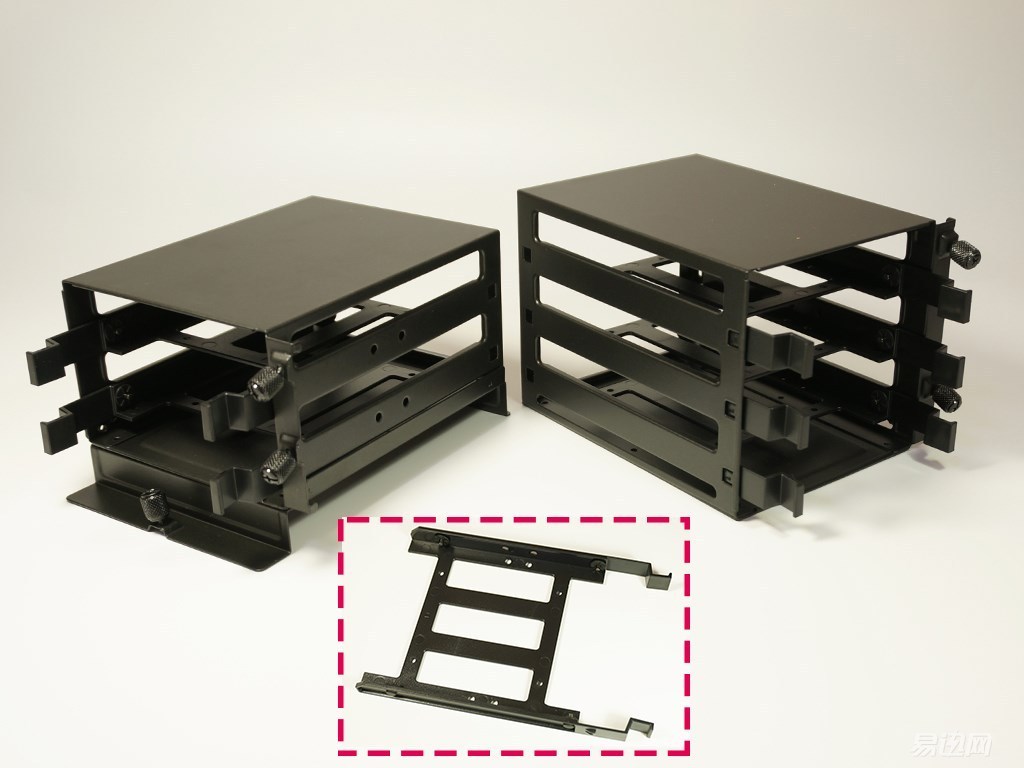
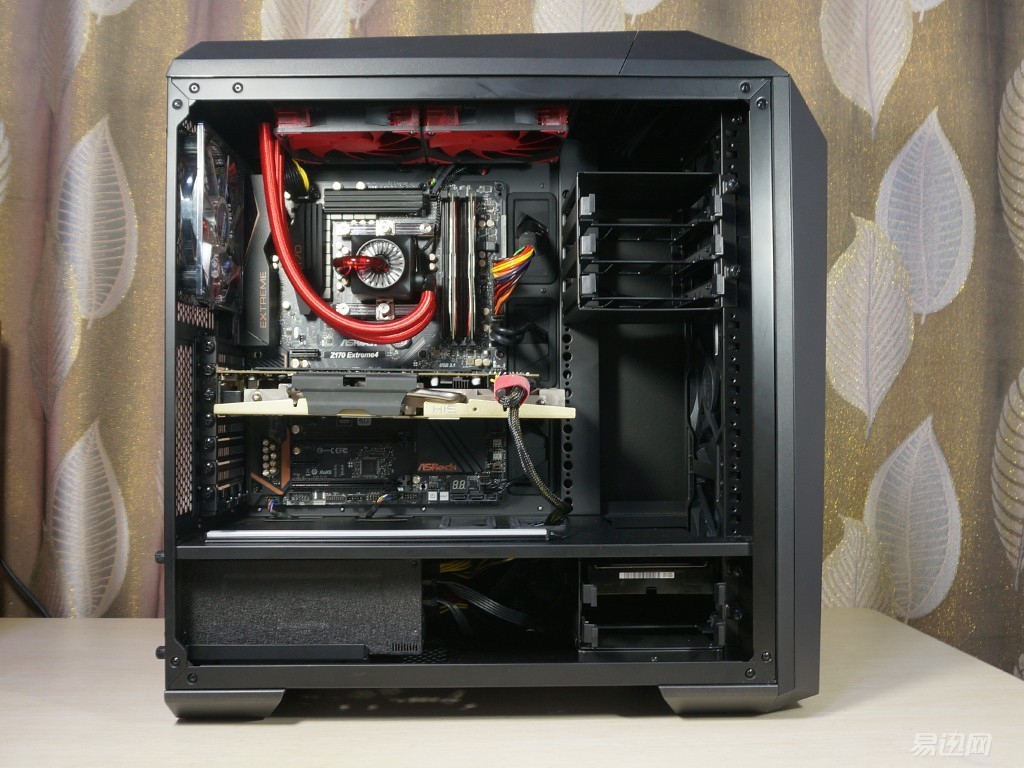
Take a look at the inside of the chassis: A dual-optical drive cage, a three-bay hard drive cage, and a double-disc drive cage are standard, but they are not filled with the left shelf.
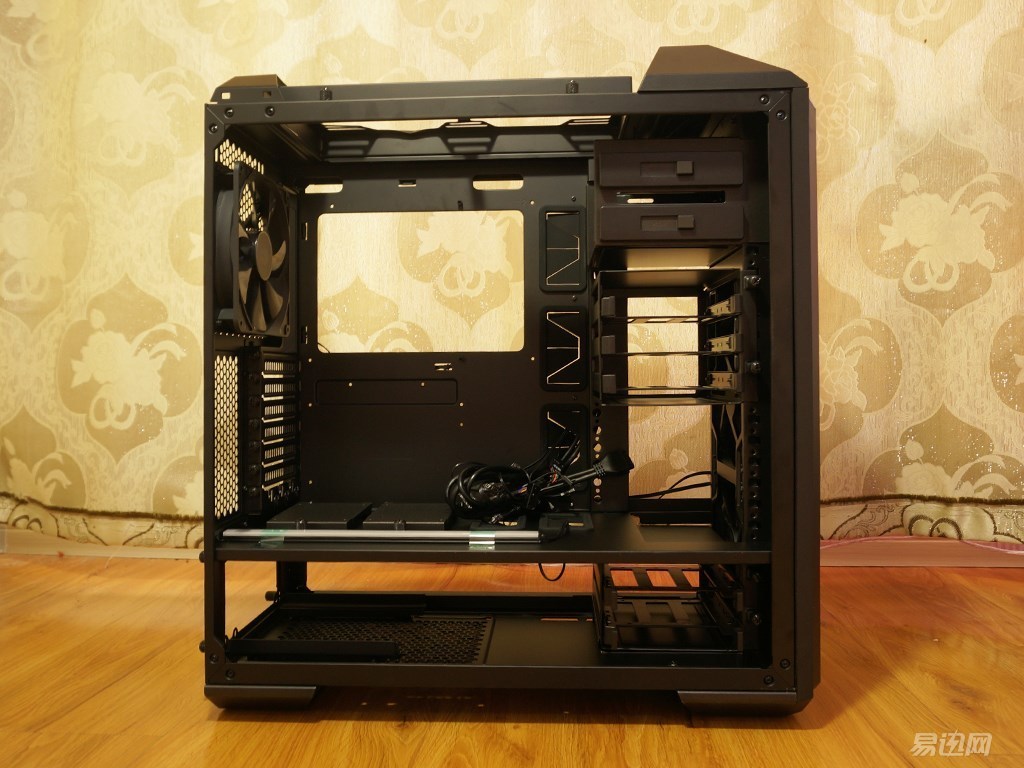
Internal details of the chassis
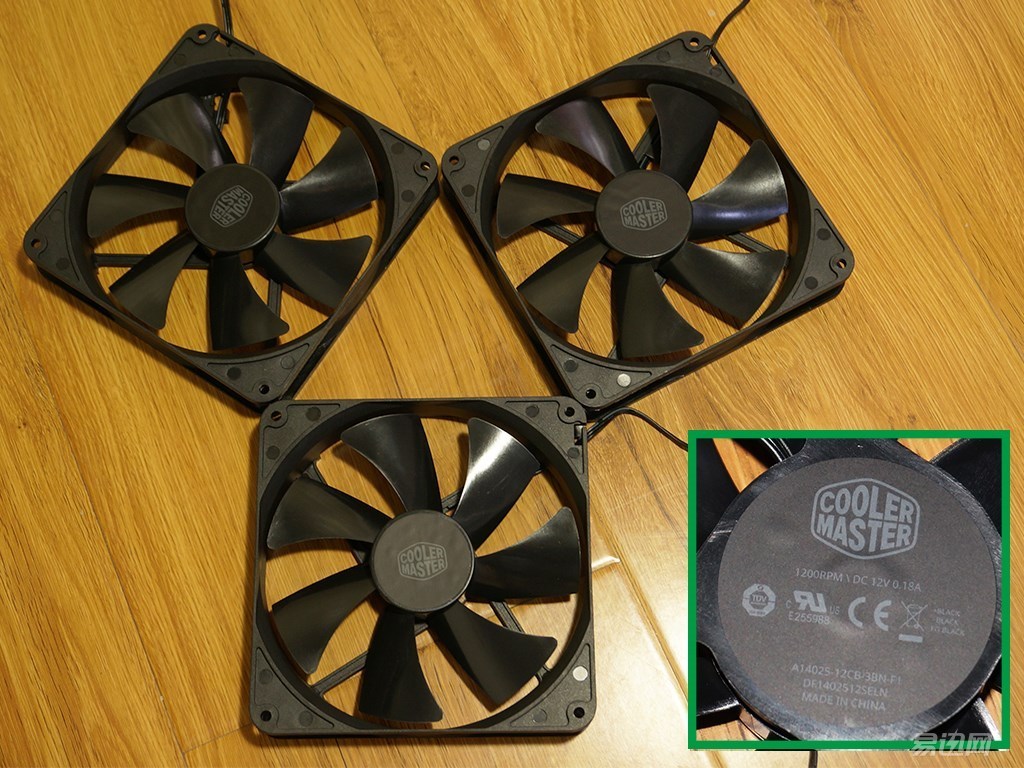
In front of the standard two two 140mm fan, behind a 140mm fan, a total of three fans.

The fan is fixed speed 1200RPM; 12V & 0.18A
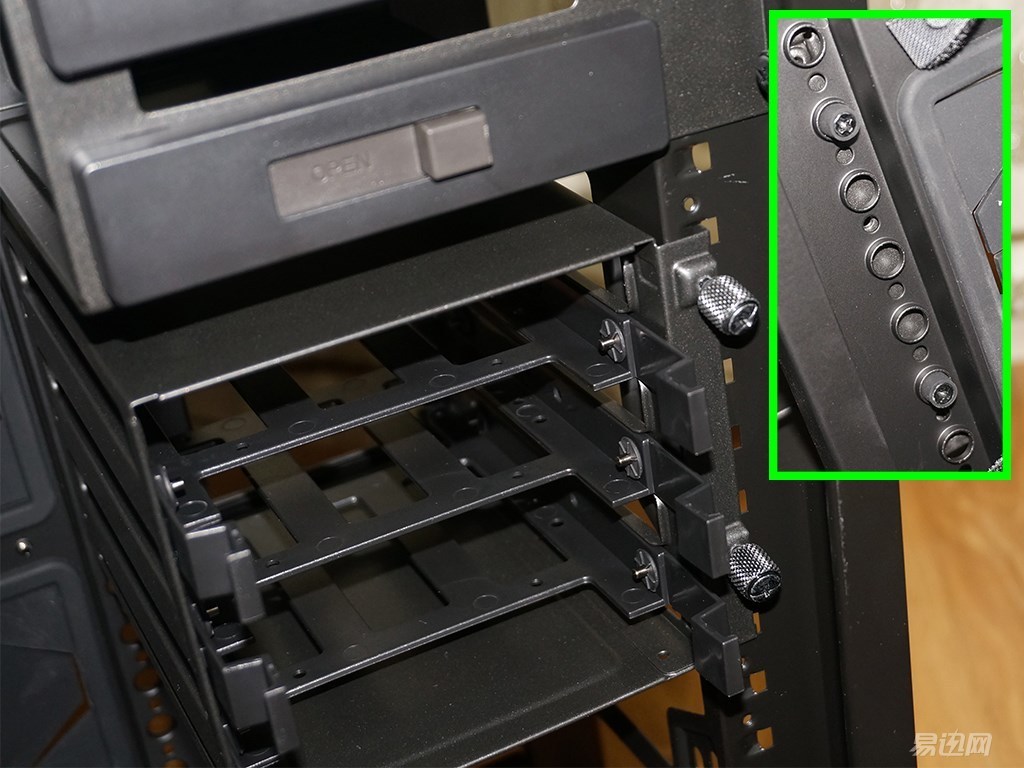
The front of the hard disk cage is screwed by hand screws. There are similar plugs on the back and rubber gaskets. It is estimated to reduce resonance noise.
All are removed: In addition to the optical drive and the hard disk cage there are two 2.5-inch hard disk shelves; in addition the I/O area can also be removed individually.
2 different hard disk cages, plastic disk tray, screw-free installation of 3.5-inch hard disk, compatible with the installation of 2.5-inch hard disk, but the need for screws.
The bottom power fan has a removable dust filter: The power supply has a separate shelf

Can be demolished are basically demolished, take a look at the chassis skeleton


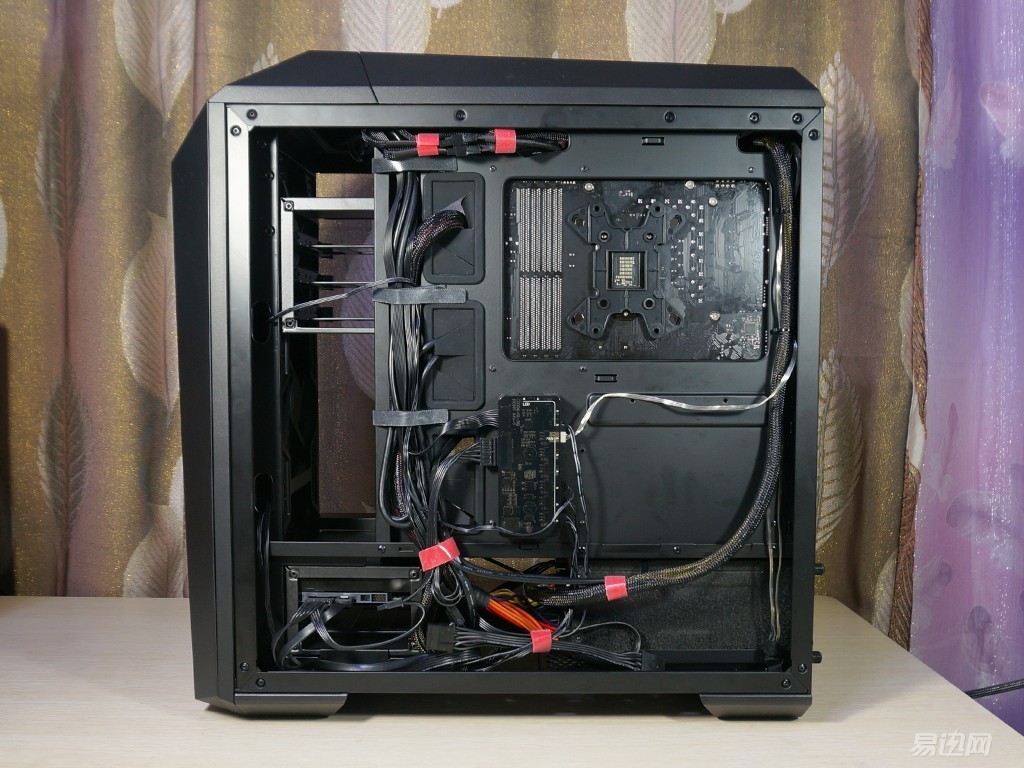
The space of the back line of the chassis is about 2cm, but there is a cable management slot between the hard disk rack and the routing hole. You can put some thick lines (such as 24pin) to ease the stress of the management line.
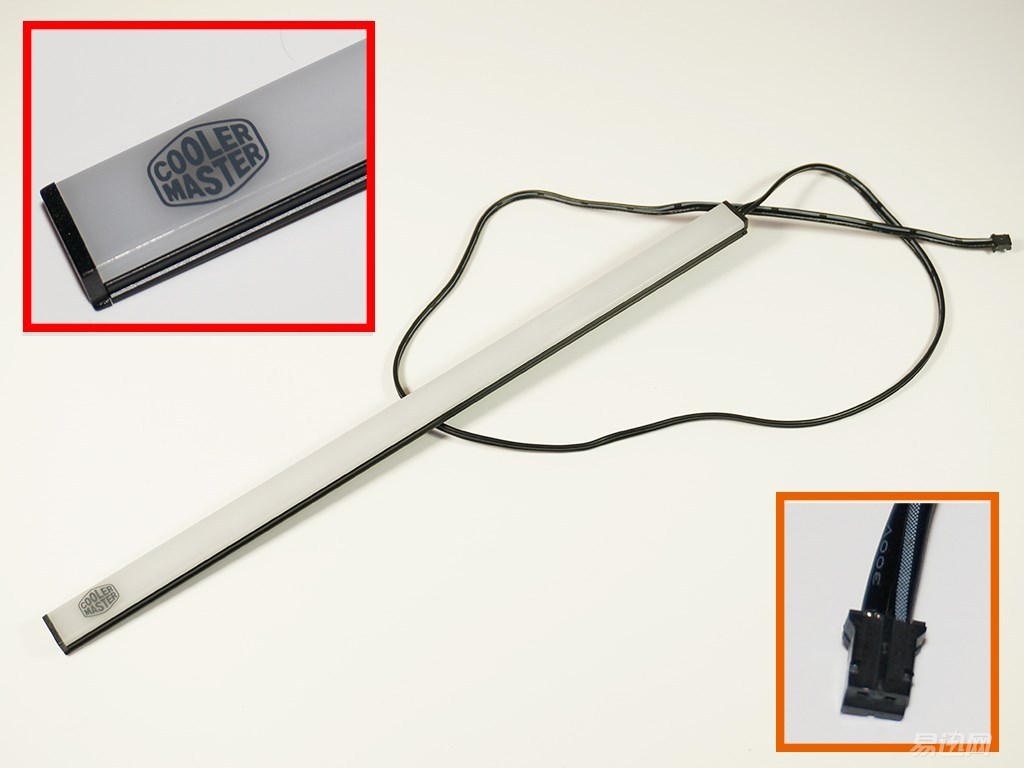
Another difference between the Maker 5 and its predecessor is that the LED&fan controller can control four LEDs and six three-pin fans powered by SATA, with brown acrylic boxes on the outside. However, there is only one fixed position and it cannot be moved.
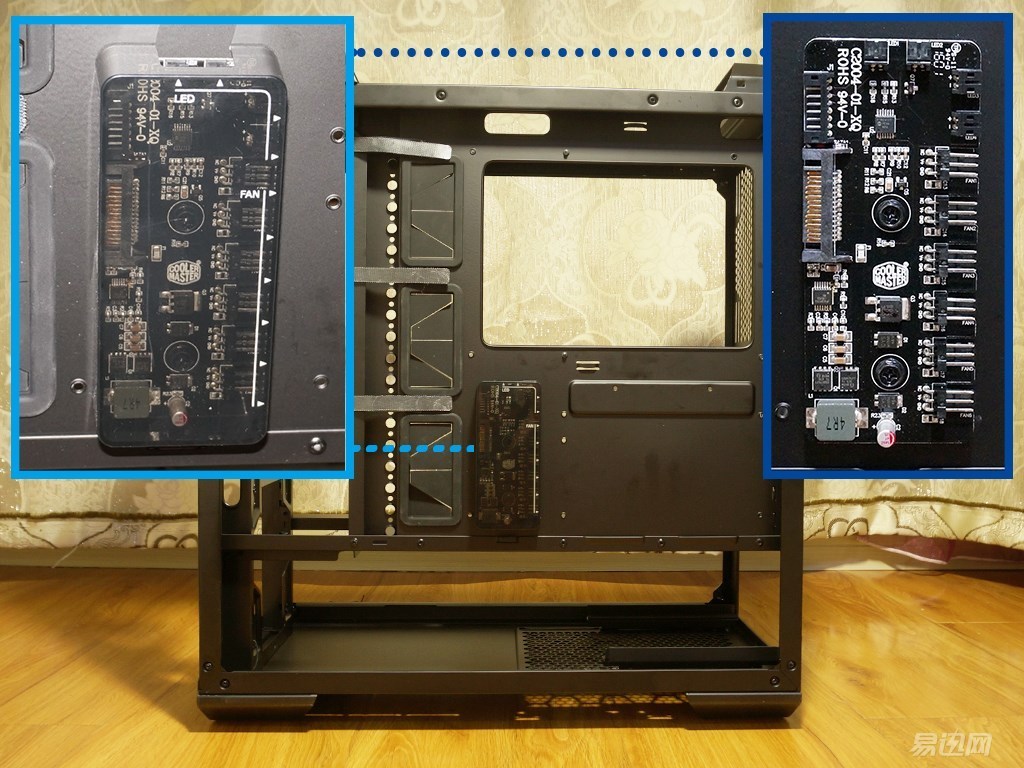
At the same time with a light bar, red LED, 2 pin power supply, cool specifications, and can not be used for other chassis (of course, their own DIY to normal 3pin on it)
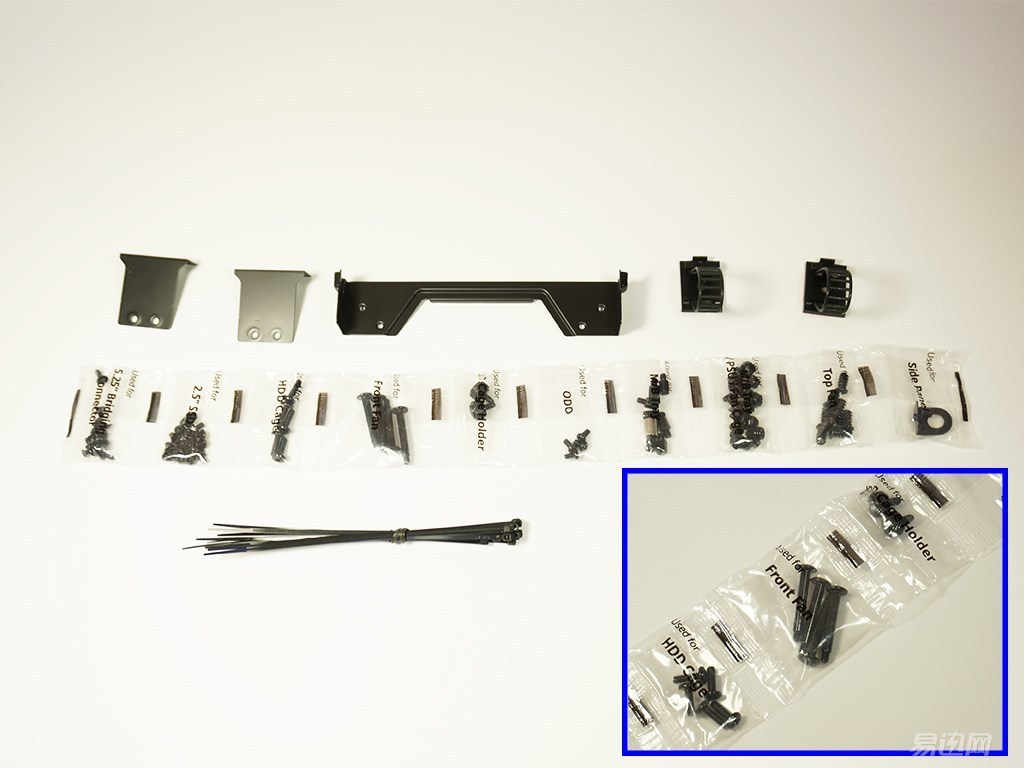
Screws and other accessories are packed in a box. The box is still very delicate
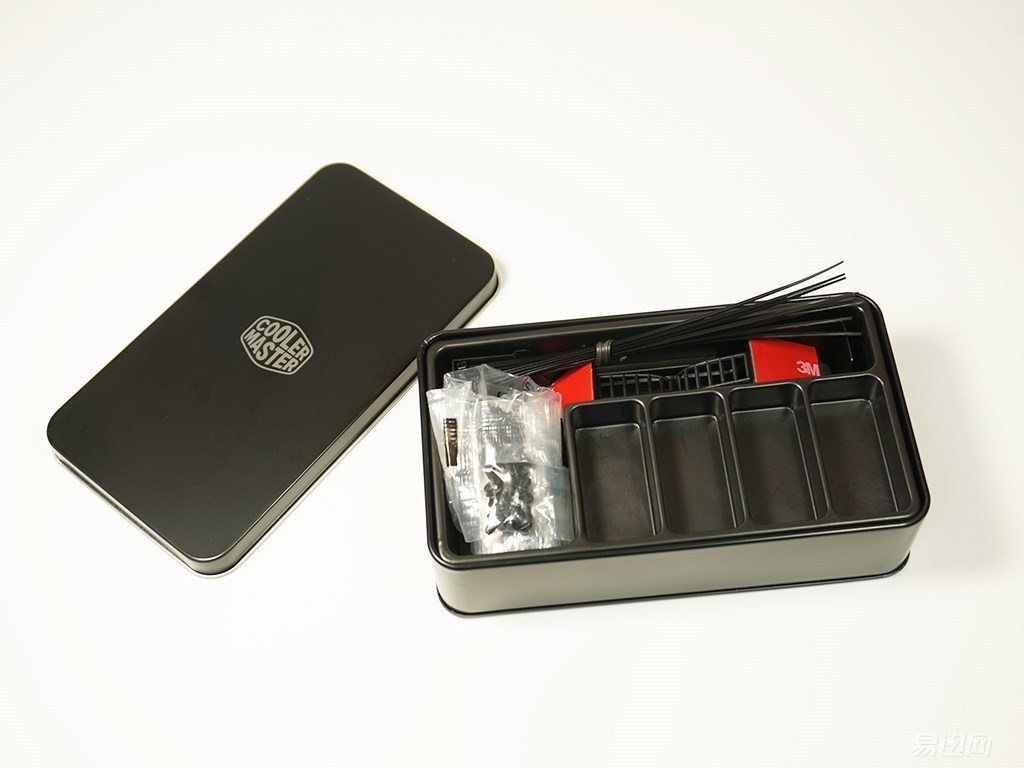
Screws are packed in a separate plastic bag and marked with the purpose of the screw (in English), very careful
After the introduction of the basic situation of the chassis, start the installation:
Configure yourself as:
CPU: Intel I5 6600K
Motherboard: ASRock Z170 Extreme4 Motherboard
Memory: Shiyan Elite Series DDR4 2400 8GB X2
SSD: Plextor M6G+ 128G M.2 2280 SSD
Graphics: HIS H290QM4GD Gold Cube
Chassis: Cooler Master MasterCaseMaker 5
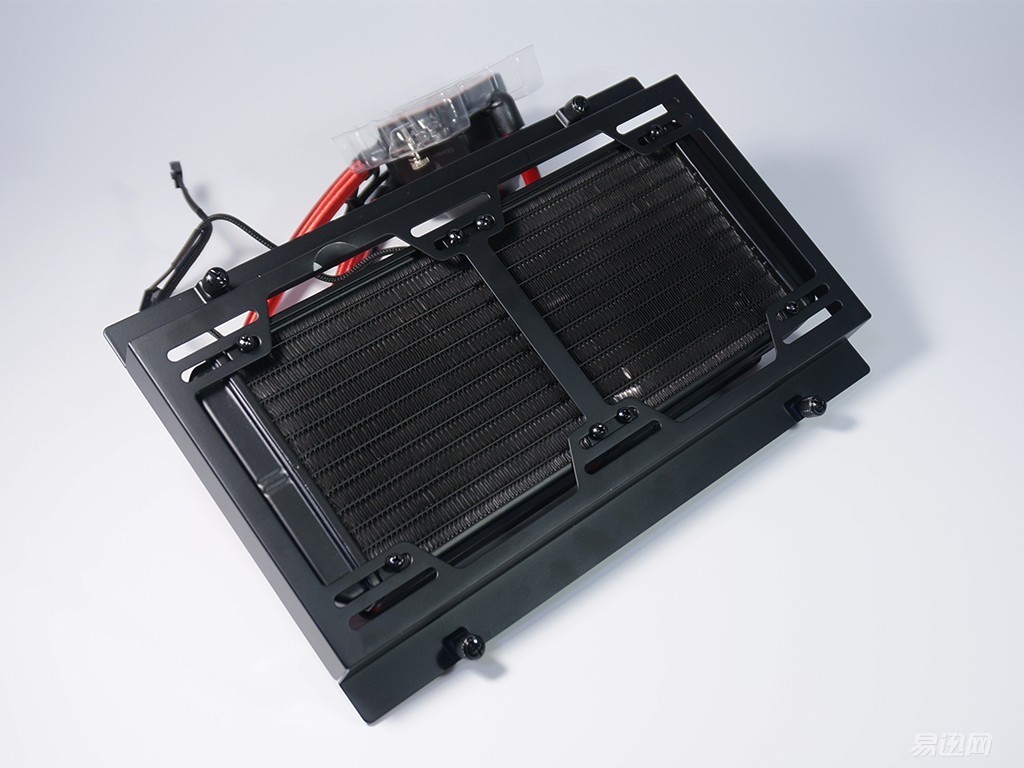
Radiator: Kyushu Captain Fengshen 240EX Water Cooler (Tmall Edition)
Power: Quanhan rated 1000W AURUM PT 1000 platinum power supply

Before installing the power supply, first install the power shelf
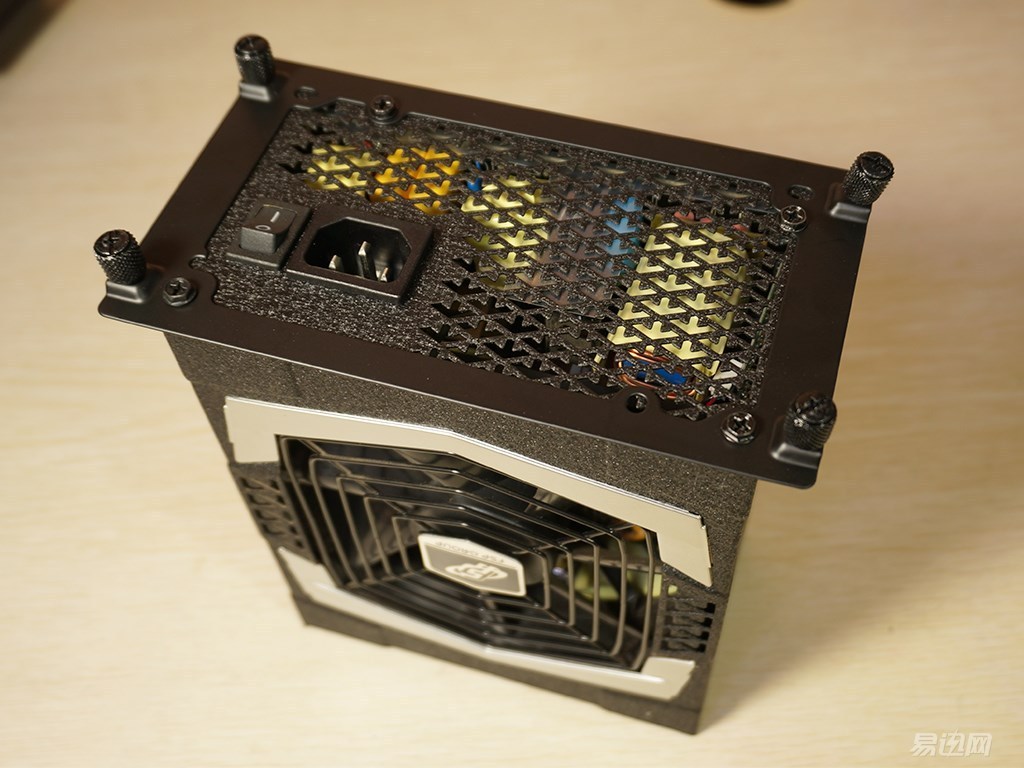
This power source is more than 19cm in length . I specifically chose a long power supply to test the compatibility of the chassis with the power supply.
Because there is a power shelf must be installed from behind the power, can not be installed from the side.
I guess the design of this rack may be to install different types of power, just replace the shelf just fine, but the installation is indeed a little more tedious.

Platform is installed first
The previously mentioned buried slot is still very useful, and there are three magic straps, and this Velcro design also spent the mind, can fix two sets of wire, not all wire can only be fixed together.

Then install a water-cooled radiator

The bracket must also be installed before installation. Of course, the design of the shelf is still easy to install.
Installed
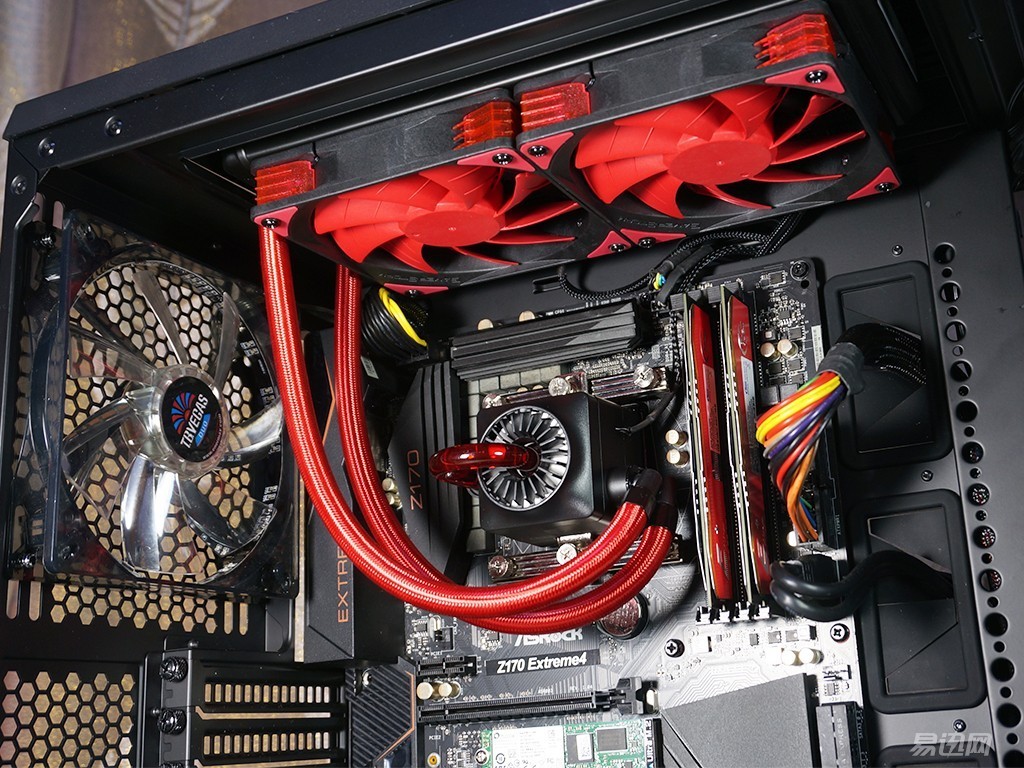
If you want to install three fans or 360 cold row you need to install a small accessories rack, of course, this will not install the optical drive.
The fan can be installed up to three 140mm; installation of 360 cold row is no problem.
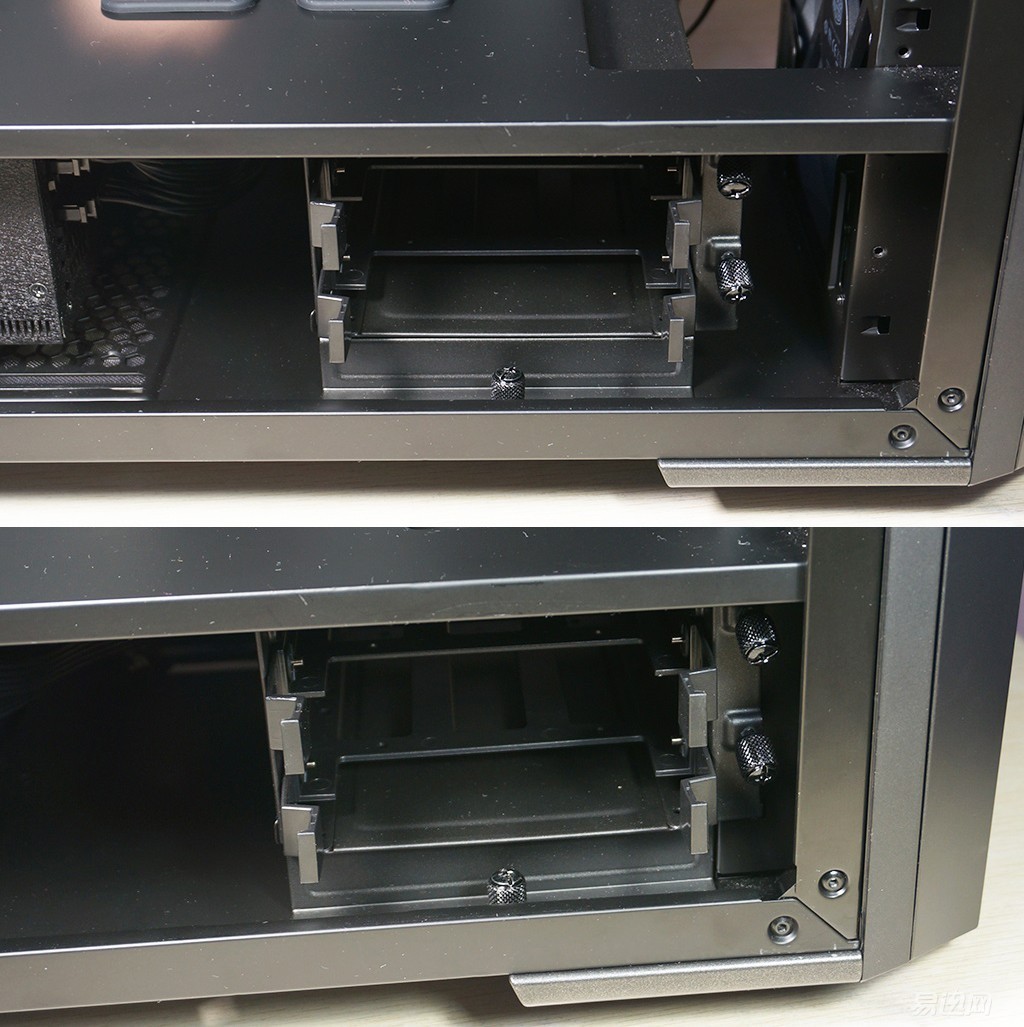
MasterCase hard disk holder design is also very unique, hard disk cage is fixed on the edge of the hole, every 2cm there is such a hole ( cool called "M.Port"), basically can be said that the position of the hard disk cage Can be installed at will.
In addition, when all the screws are not fixed, the hard disk cage will not fall, but due to the connection of the buckle, it will be suspended like the figure below.
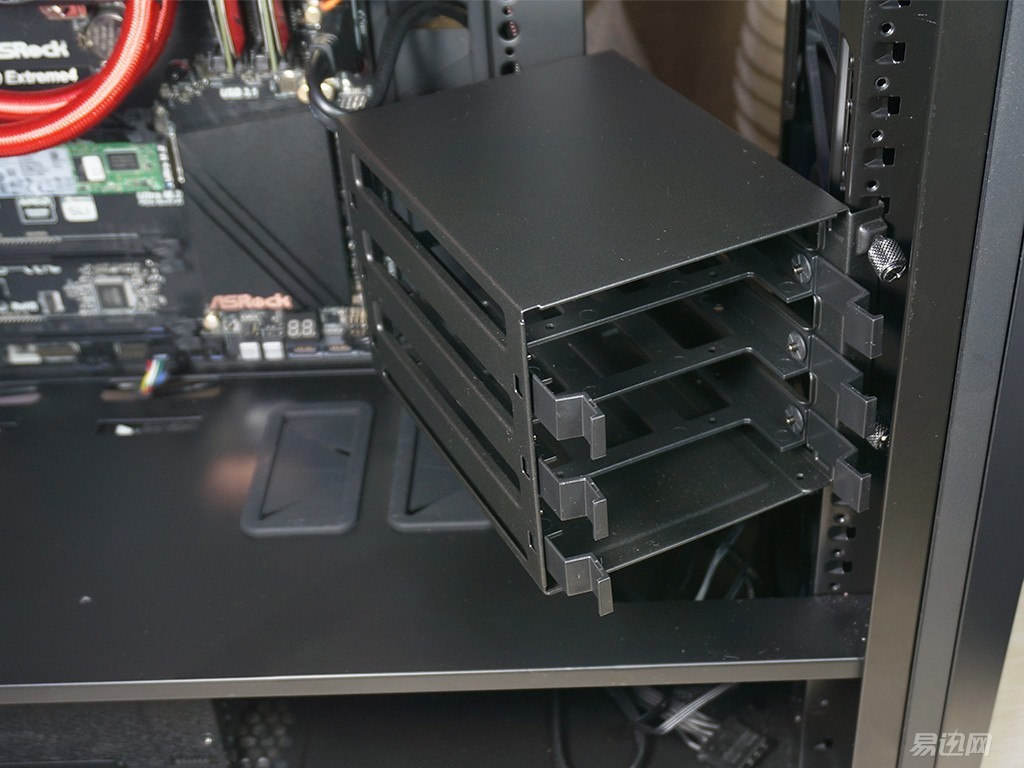
Above the hard disk cage can move up and down; the bottom of the hard disk cage can move left and right, a total of 3 locations can be selected, because I installed a long power supply, close to the power supply location that will conflict with the wire.
Moving the hard disk cage to the left can leave space for the cold row.
My solid state is M2, but I still want to introduce the installation method of 2.5-inch hard disk: First, the hard disk is installed on the shelf and it needs screws.
194289/74b5b32e/5762cb10N0fec5b87.jpg" />
The power supply compartment can be equipped with two 2.5-inch hard disks ; the back of the chassis can hold two 2.5-inch hard disks and can hold up to four 2.5-inch hard disks, but the 2.5-inch hard disk rack provides only two.
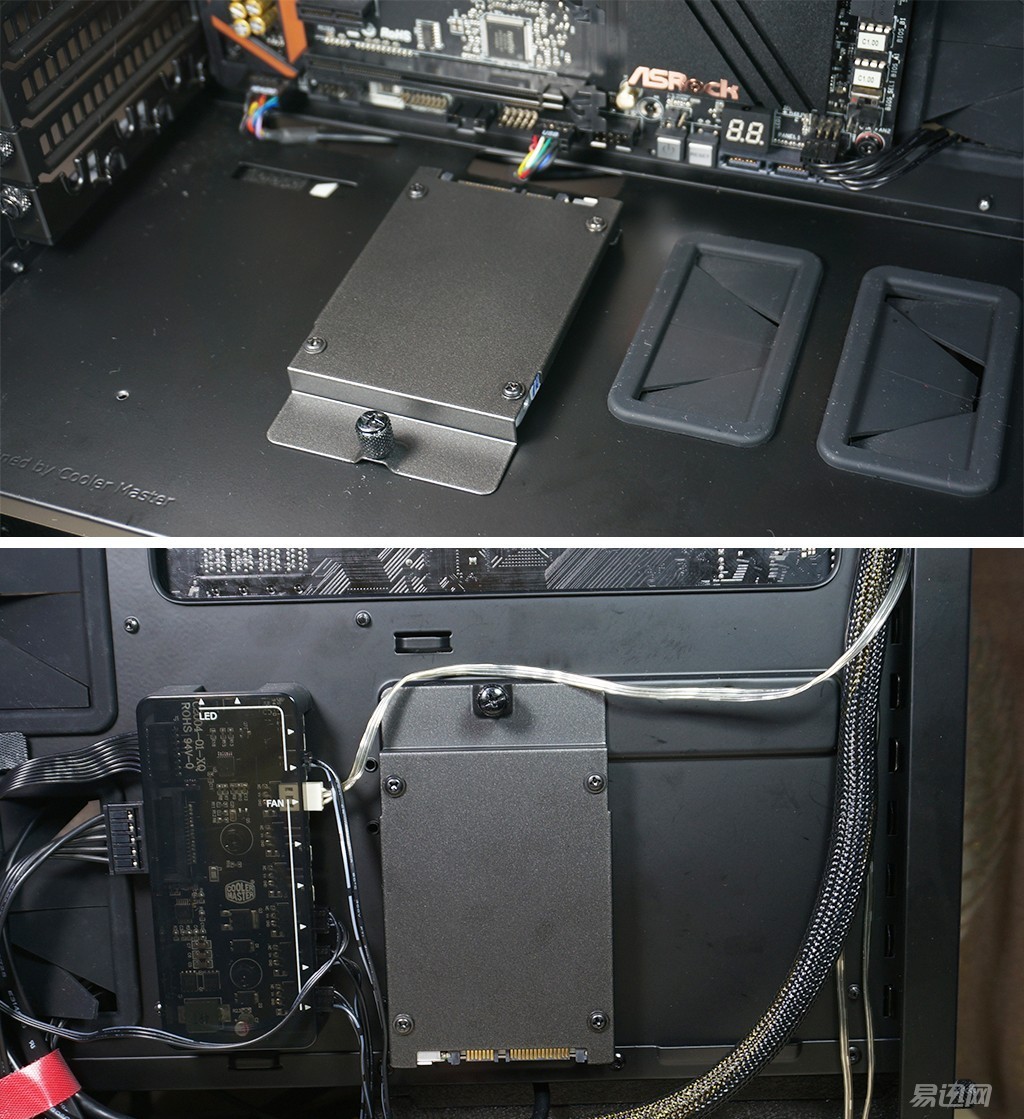
3.5-inch hard drive installation is screw-free, the installation is very simple.

Chassis front
The back of the chassis: its own management skills are still relatively slag, but it is good to close the side panel.
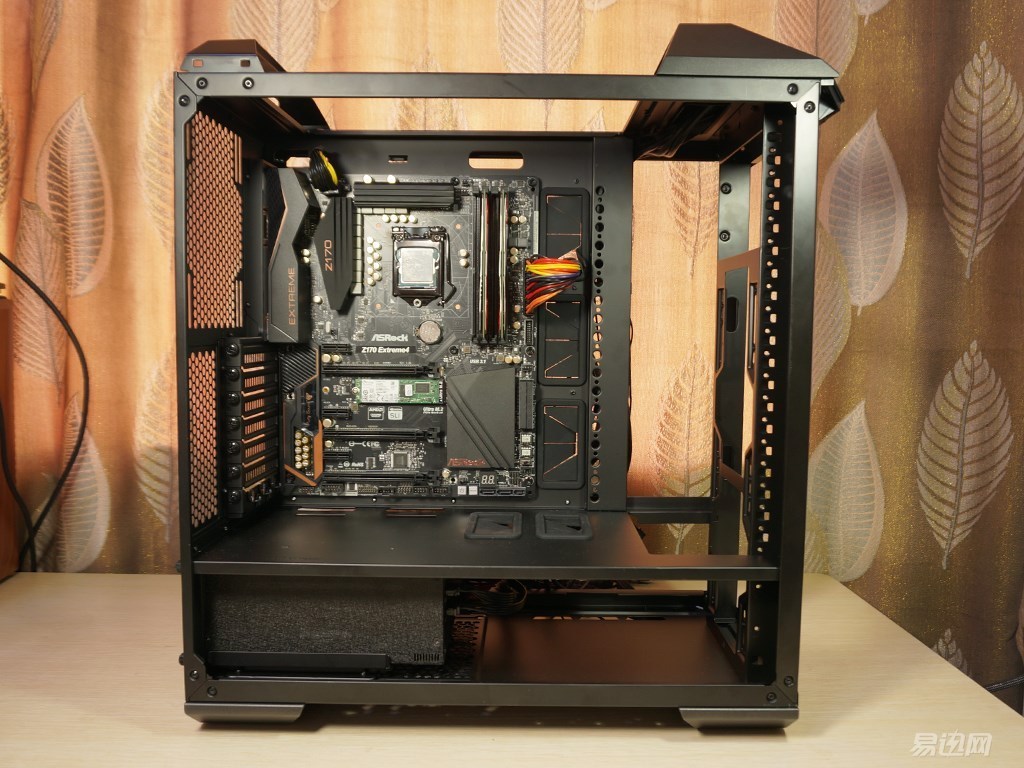
Chassis to CPU heat sink hole is still very large, you can see my standard ATX motherboard, leaving some of them to the memory location, and then install the motherboard and then install the radiator is no problem.
Installed
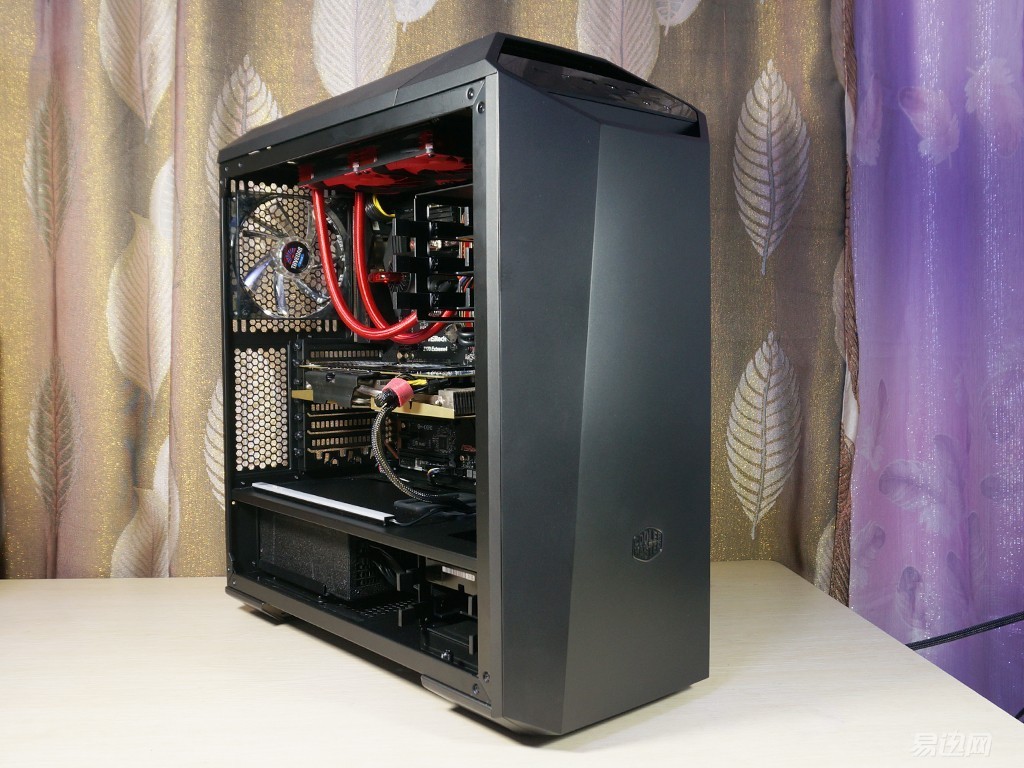
A kind of simple arrogance!
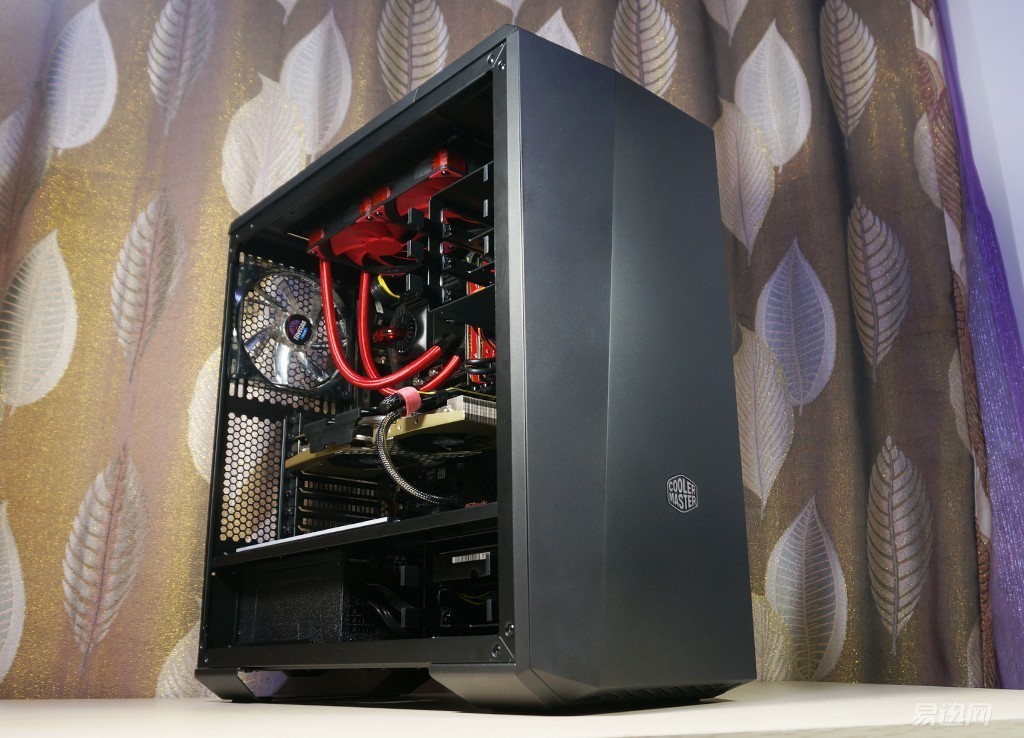
The front panel is also not completely closed, but also has room to enter the wind. If you are concerned, you can leave the front panel half open.

Light up
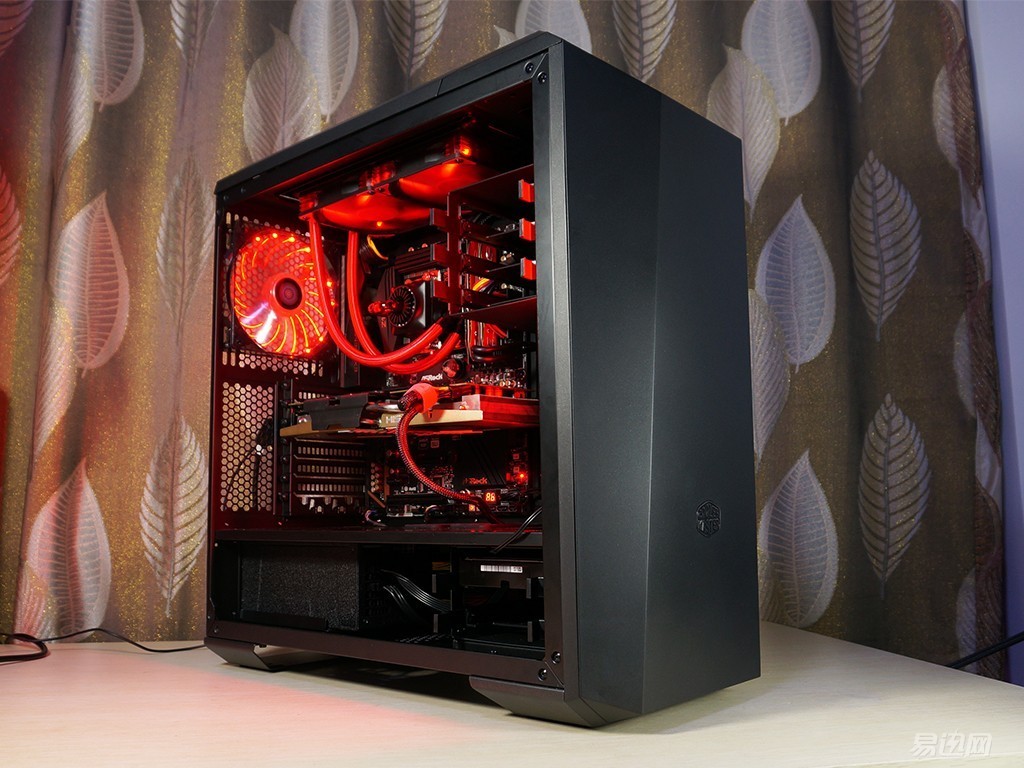
I/O indicator

Close the side panel Acrylic

Now more and more appearance of the chassis, but the MasterCase series gives the greatest feelings is its functionality, the modular concept allows users to choose their own needs, but also to maximize the function of the chassis, and finally let the chassis Become the most reasonable structure for users.
The quality of workmanship is very solid; the rich details of the design are impressive (such as Velcro, hard disk cage design); in addition to the installation experience also used the mind (hard disk cage is no fixed suspension state, no wonder you can get so many awards ( Reddot Award 2106 Winner, iF Design Award 2016, etc.)

Of course, a product can not be perfect, MasterCase series is characterized by a large number of accessories, but Marker5 as the top product of the series, accessories are not fully equipped, like the tempered glass side plate also need to be purchased separately, the user still has to spend Extra money can really experience the ultimate version of the ultimate version, slightly uncomfortable. I think at least Marker5 standard tempered glass side panels, in order to meet the status of the ultimate body!
Control: The fan controller can choose low speed and high speed, if there is a closed gear, it will be more perfect;
The LED light controller can be turned on, off, or in breathing mode, but only one light bar is a bit unpleasant. In addition, the fan is not an LED, and it may be possible to launch a full-color RGB version later!
